The Cuddle Doll Head
In this lesson, we will learn to make the doll head. Starting with rolling a woolen ball, turning it into a "brain", shaping and sculpting the head, to covering it with skin fabric. In the first video I will show you how to create the woolen ball that will be the inside of the doll head.
I start with a small piece of wool batting, which I gently roll into a ball. The wool fibers will stick to one another, which makes it easy to add pieces and roll the wool ball tightly. It can be tedious work, especially in the beginning and if the wool batting doesn't contain much lanolin. It does get easier as the ball gets bigger. Just remember to add small pieces, one at a time. It ensures that the head will be firm and keep its shape better later.
I will show you how the 13-inch ball in circumference we make in this video will shrink down to a finished head circumference of 11 inches.
Now, let's finally get some hands-on experience!
In this section of the doll making process you will need the following stitches:
-double wrap-knot
-cross stitch in place
-ladder/invisible stitch
Enjoy watching the video!
We created a ball that we turned into "the brain" for our doll. Now we will continue and cover it with layers upon layers of wool and adding tube gauze to shape it.
You will need the following stitches:
-double wrap-knot
-the basic whip stitch
We completed the shaping of the head and are now ready to sculpt. This part is one of my favorite parts in doll making, as this is the moment when (I believe) my doll will receive his or her character.
You will need to know the following stitches:
-cross stitch in place
-ladder/invisible stitch
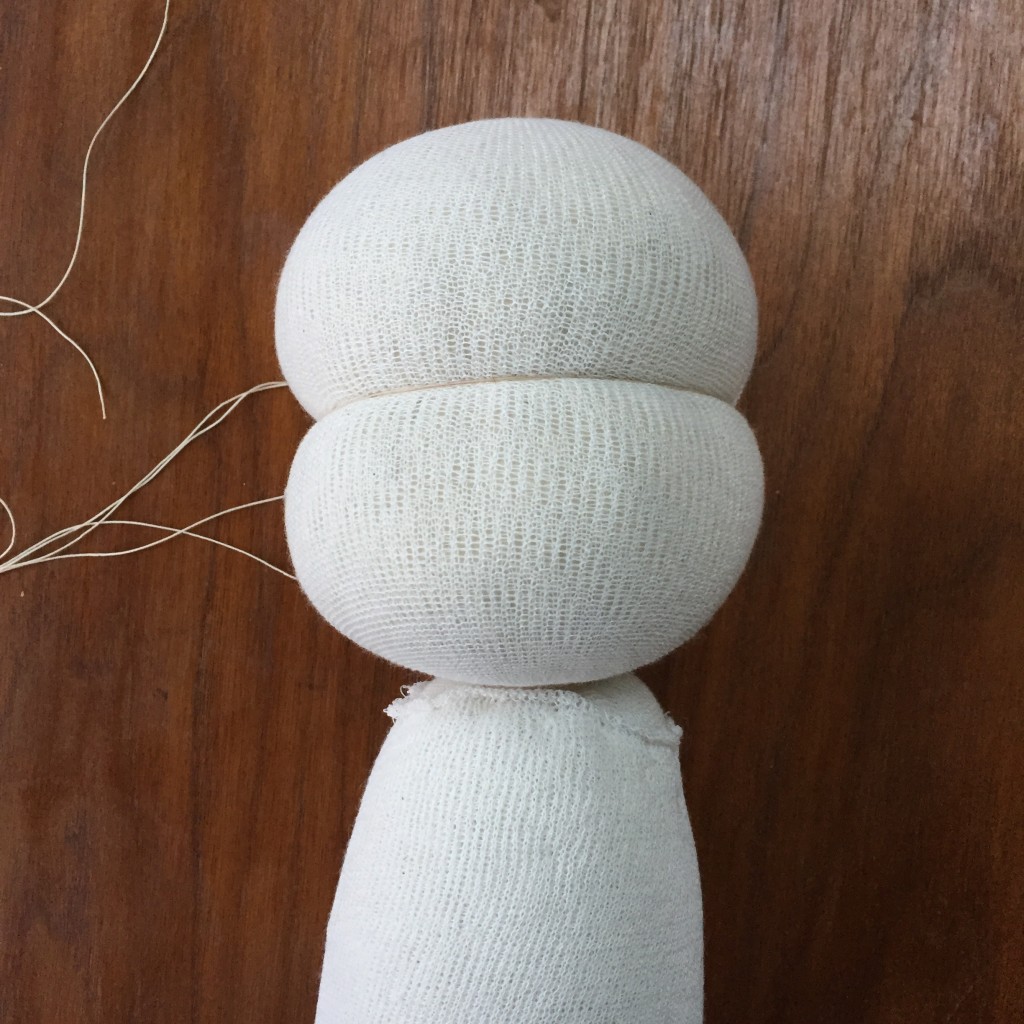
The eye string like the equator between "north" and "south" pole (top of head and neck). Please be sure it is centered, don't let the grain of the fabric trick you.
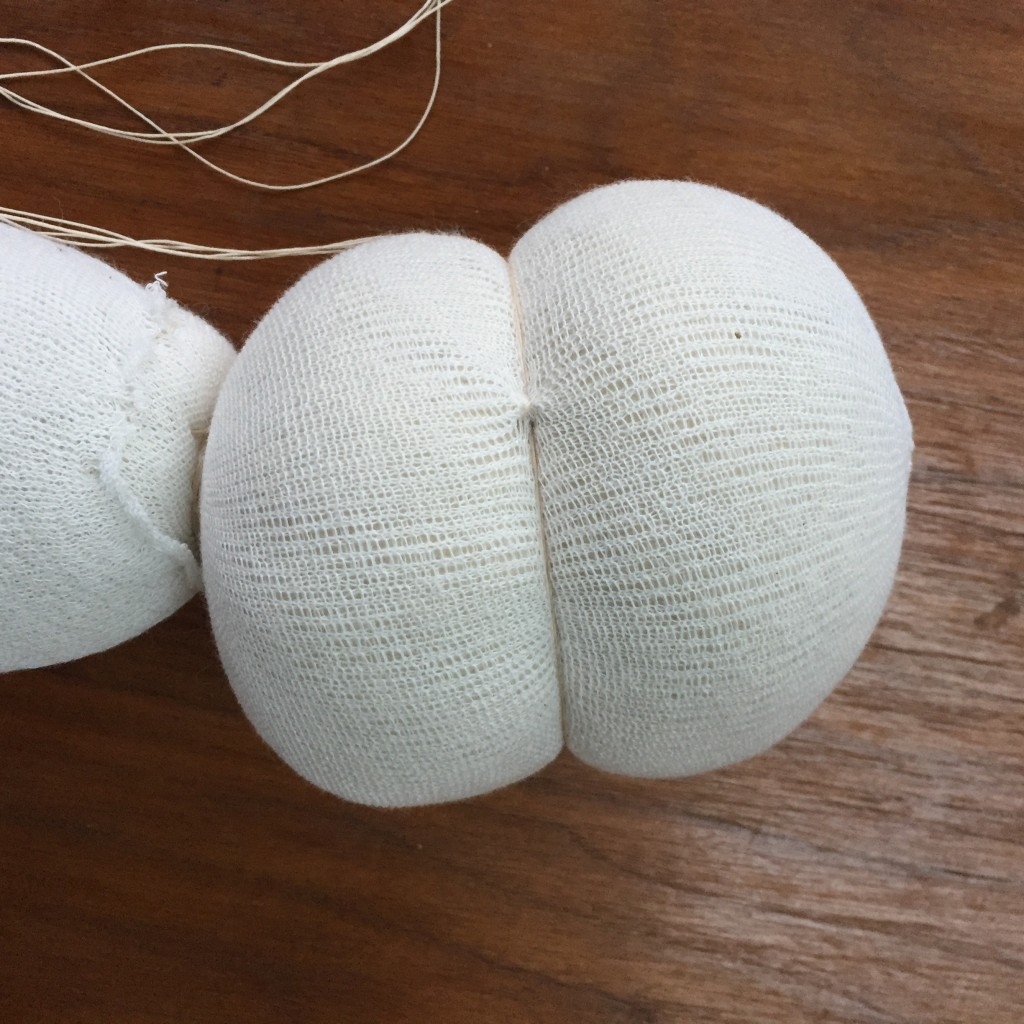
Thanks to Nancy who pointed out that the video isn't clear enough I am adding some pictures below.
The eye-string runs like the equator between "north" and "south" pole (top of head and neck). Please be sure it is centered, don't let the grain of the fabric trick you. I am posting a frontal view (first image) and a side view (second image) here, because that isn't shown long enough in the video. The side view shows also where the cross stitch in place secures the eye-string very well.


We finished sculpting the head and are ready to cover the head with skin. We will now need the skin fabric.
We will be using all of the stitches:
-the running/basting stitch
-the back-stitch
-the whipstitch
-the ladder/invisible stitch.

